
Welcome back on the Cisco train that leaves us with the next step of the series Installing Cisco Nexus 1000V into Hyper-V. In the last post we created a simple switch configuration and in this post we are going to connect the VSM and apply the configuration on VMM.
There are 2 ways to deploy the Cisco Nexus switch into VMM. Option 1 is to use a script provided by Cisco. This script does also create an new Logical Switch, creates the Port Classifications, uplink profiles and the virtual networks. Advantage here is that if you have a new setup of an Hyper-V environment it saves some time to configure the switch, virtual networks etc. Option 2 only creates the Logical Networks and port profiles. Classifications and the Logical switch is an manual step afterwards.
On the SCVMM Server open a administrative PowerShell and navigate to the Program Files\Cisco\Scripts\VMMConfig
Run the Deploy-Nexus1000V-VSEM.ps1

Enter the ip address of the VSM, admin user and password and a name for the Logical Switch to be created:
![]()
If an error occurs while trying to import the configuration like here:

You might need to import the certificate from the VSM into the trusted root certificate of the VMM Server:


Also be aware of the time when the certificate is created by the VSM. This might differ from the current time so the certificate is still invalid after the time you imported it.
If you tried the import with the script several times please also review your run as accounts and clean them up ![]() Every time you run the script it creates a new run as account for the configuration.
Every time you run the script it creates a new run as account for the configuration.
![]()
When the import is successful you get a notification and an output of all the settings that are created by the script:
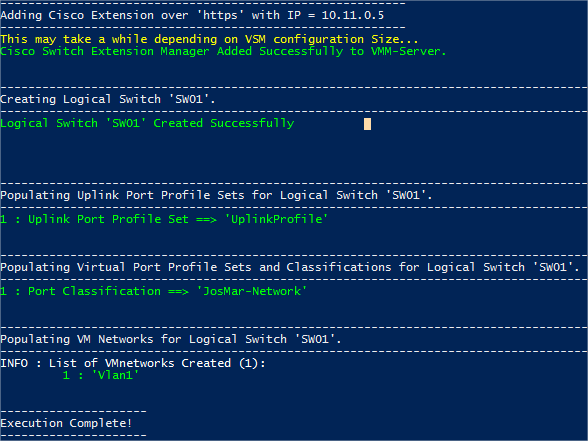
When you verify this in the VMM you will see the items in the output are created in VMM:

![]()
Lets take a look at the second option:
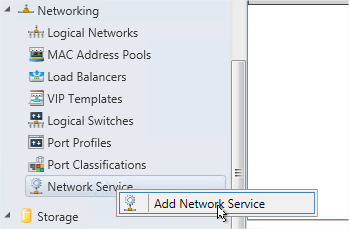
You go to Fabric and expand networking. Then right click Network Service and choose Add Network Service
Give a name to the service:

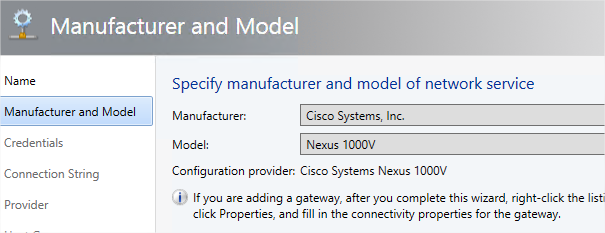
Select Cisco Nexus 1000V as manufacturer and model:
Create runas credentials in the wizard for the Cisco Admin user:

Connection string is the URL of the switch (https://10.35.0.6)

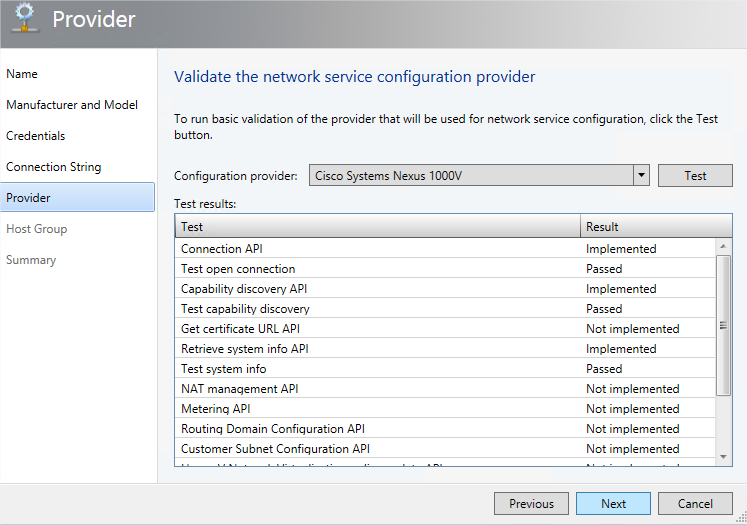
Hit test and when passed hit next (Be aware of the certificate trust):
Next and Finish
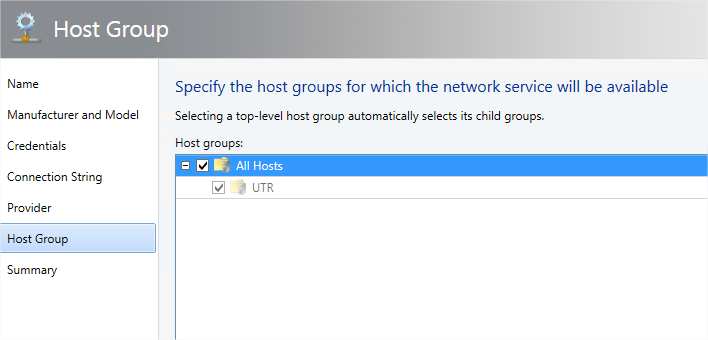
You see the Switch back under the network service tab:

You also see that after the service has been added to VMM the configuration we created earlier is applied on the VMM like Logical networks that are created and the port profiles that has been created. Now you have to create manually the Virtual Networks, Logical Switch and Classifications in the fabric.
After you used one of the above scenarios you need to deploy the logical switch to the hosts. We will demonstrate this in the next blog post.