
Hyper-V NVGRE Gateways are used to allow Virtual Networks in Hyper-V to connect to the internet or establish a VPN connection to the tenant’s on premise environment. An NVGRE Gateway Cluster is configured as a 2 node cluster. You can download a Service Template in VMM to deploy the Gateway’s as a service tier. Personally I experienced a lot of issues using the service template and the lack of Generation 2 support in Virtual Machine Manager (VMM) Service Templates. I have spent some time on creating a PowerShell tool to accomplish this. In this post we are going through the complete deployment and migration of a Hyper-V NVGRE Gateway. In order to use the script we need to have the following components in place:
- Dedicated Hyper-V Host Cluster with shared storage. Best practice is to deploy these host in a separate (HNV) domain and a separate management network for the Hyper-V host and the Virtual Machines.(not required for this toolkit)
- Connectivity from the machine where you run this script to the VMM Server, the dedicated Hyper-V Cluster and the management network where the Gateway VM’s will be deployed to.
- A VMM Template with OS settings configured to join the Virtual Machine in the domain where the Hyper-V hosts are joined. It is required to have the Hyper-V hosts and the Gateway Virtual Machines in the same domain.
- IP Pool for Internet and (HNV) Management network.
- A Run as Account configured in VMM that will be used as run as account to add the Gateway Cluster to VMM.(This is a domain user)
- A Run as Account configured in VMM that will be used for the Local Administrator credentials on the Gateway VM’s we are deploying.
- Name resolution between Management domain and NV HNV domain.
Download the script from the TechNet Script library and run it in PowerShell. Enter your VMM server or cluster name and click on Connect:

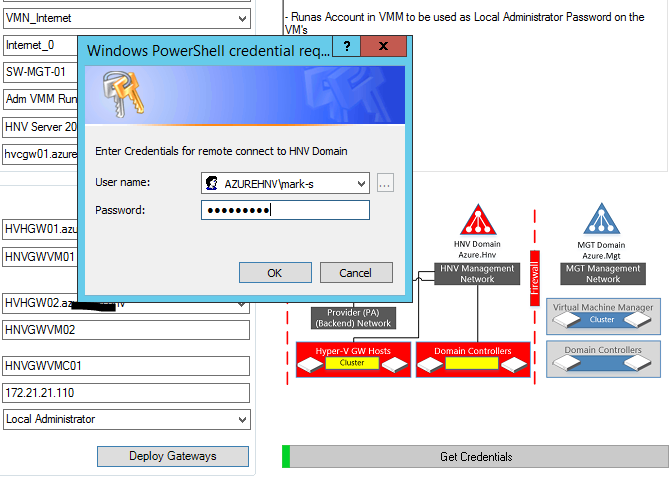
After the connection to VMM is established it will gather all the settings we need for a deployment of a Hyper-V NVGRE Gateway Cluster. Fill the form and click on Deploy Gateway:
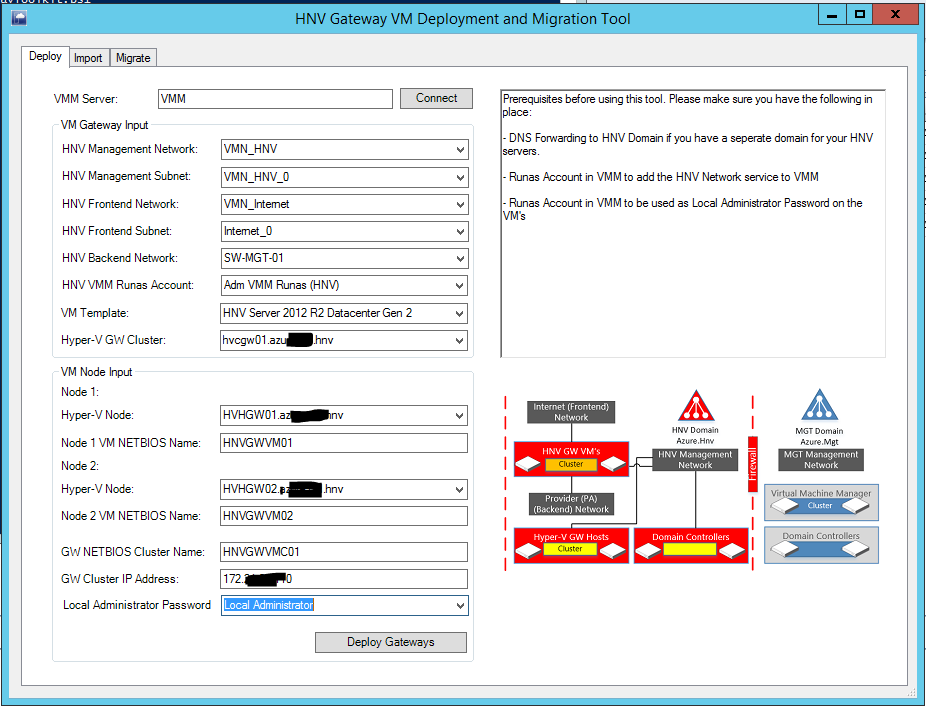
To clarify the network part in the tool. You will see at the VM Gateway input that there is a pair for the HNV Management Network and the HNV Management Subnet. Each pair represent the settings as you would configure them in the VMM New Virtual Machine wizard. The same is for the frontend network that represents the Internet network:
The HNV Backend Network is a single input as this represents the standard switch where you connect the adapter to:
Next step is to enter the credentials for an administrator that has permissions on the Hyper-V cluster and Gateway VM’s after the deployment. This can be your own Domain Administrator account. It’s not used as service account or stored in the server configuration.
The deployment can be monitored from the tool. It will do the following tasks during the deployment:
Deploy the first Gateway VM:

Deploy the second Gateway VM:

Configure Roles and Features on the Gateway VM’s:

Configure Backend network on the Gateway VM’s:

Configure Shared VHDX disks on the Gateway VM’s:

Creating the new Cluster on the Gateway VM’s:

And we are done!

After the deployment you can login to the GW VM Nodes to verify the deployment. Leave the tool open as we need it when we finished the verification of our GW VM Cluster. Otherwise you might have to re-enter all details:
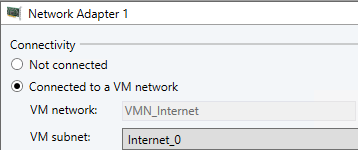
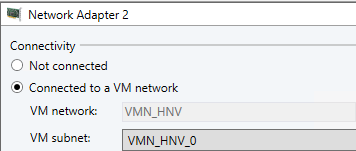
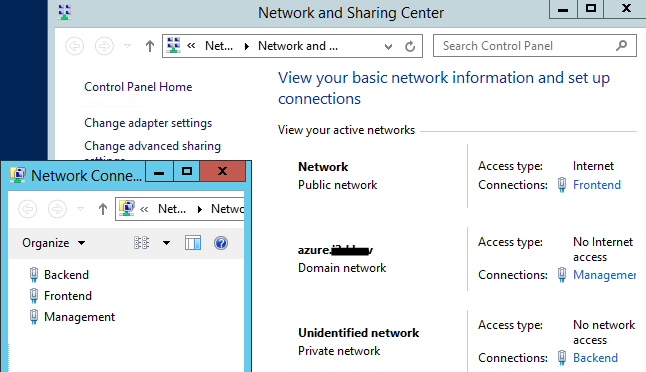
The network should have 3 adapters.
- Management network
- Frontend network that is connected to the public internet
- Backend that is connected to the standard switch for the provider address network
Also check that the frontend is “public network” Often I see in deployments that it is attached as domain network. And if you enable Remote desktop, it will be also available on the public IP address.
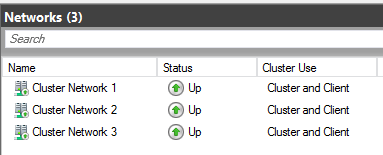
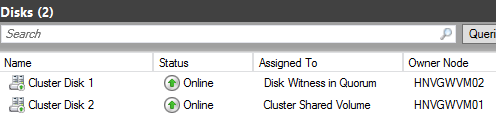
When you open cluster manager you see a cluster with 0 roles and 2 nodes. All networks are configured for Client and Cluster communications and the storage has been provisioned as well:

In some cases you might need to add some static routes and remove the default gateway on the management network if you have them specified in your IP pool. Please do that now and don’t forget to set the route persistent by adding the –P on the end of your line. (Example: route add 172.0.0.0 mask 255.0.0.0 172.21.20.1 –P) If you RDP into your VM do first the route modification and then remove the gateway 😉
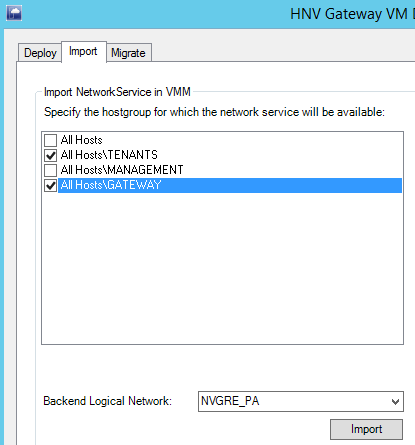
When you have verified all is up and running we can go back to the tool and import the Gateway Service into VMM. Go to the import tab and select the Host Groups where you want to attach the Network Service to. Select the backend logical network that represents the Provider Address space network and click on import:
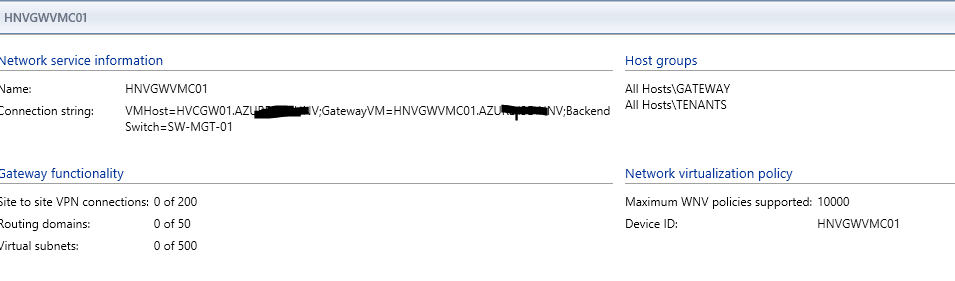
Verify the network service is imported into VMM:
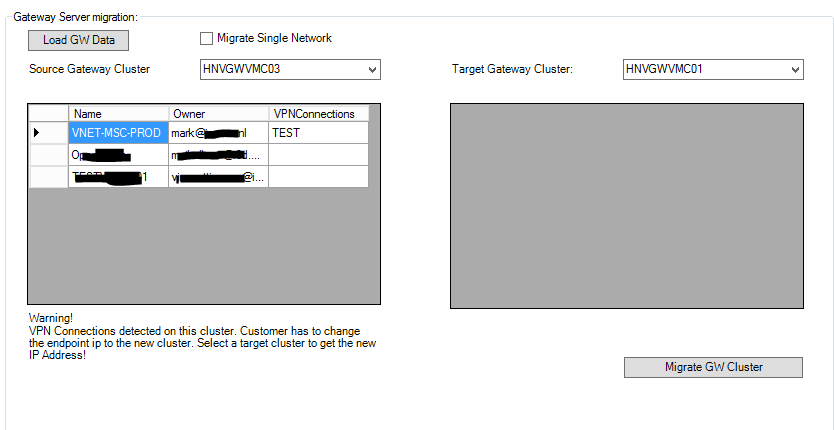
Optional; When you have built a new Gateway cluster and you have for example a standalone Gateway or an older Cluster that you want to migrate to a new one you can go to the migrate tab. There are 2 options.
We can migrate a complete Gateway cluster at once or migrate single networks between gateways. Click on Load GW Data to refresh all GW information from VMM.
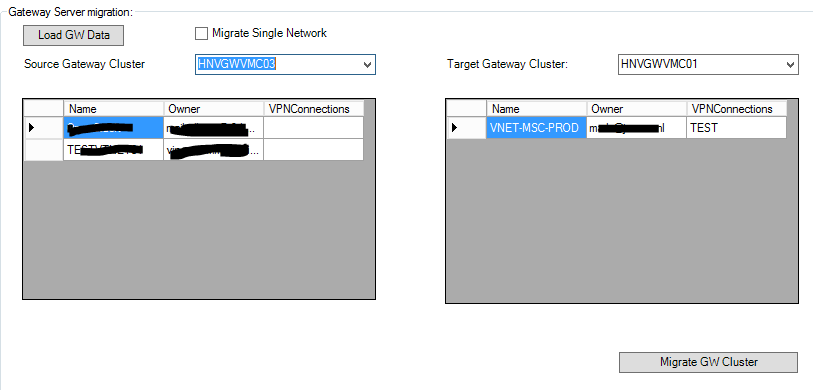
Here you see the Complete GW Cluster migration view:
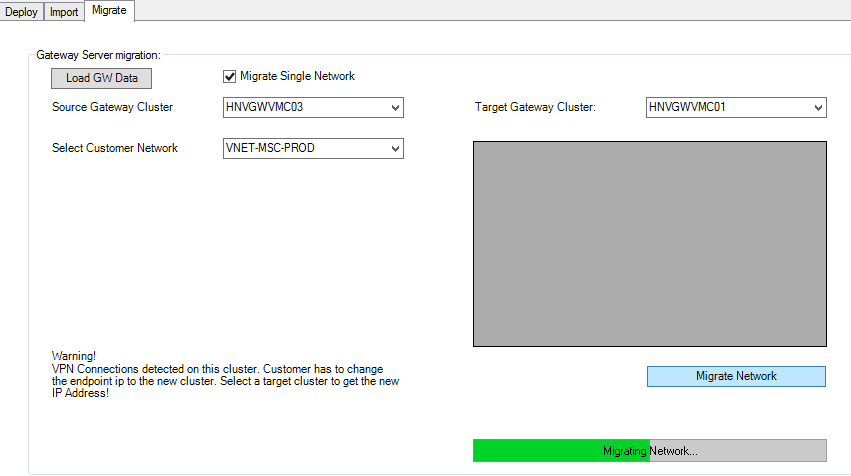
Or when we check Migrate single network we see this view:
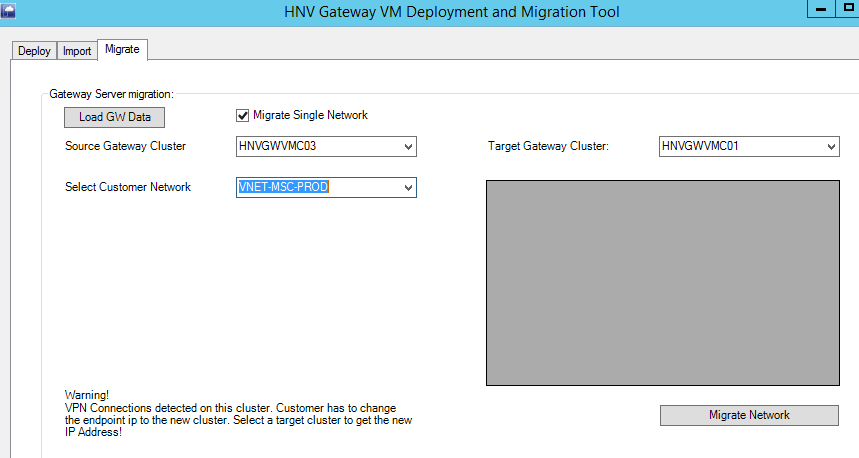
We just provisioned the new Gateway Cluster so I always do first 1 network to check all is running smoothly. I click on Migrate Network and the network will be moved to the new cluster. The customer has impact and lose connectivity for couple of seconds. If a customer has a VPN configured there is even a bigger impact. A new cluster has a new IP Gateway endpoint that needs to be configured on other VPN Peers endpoint:
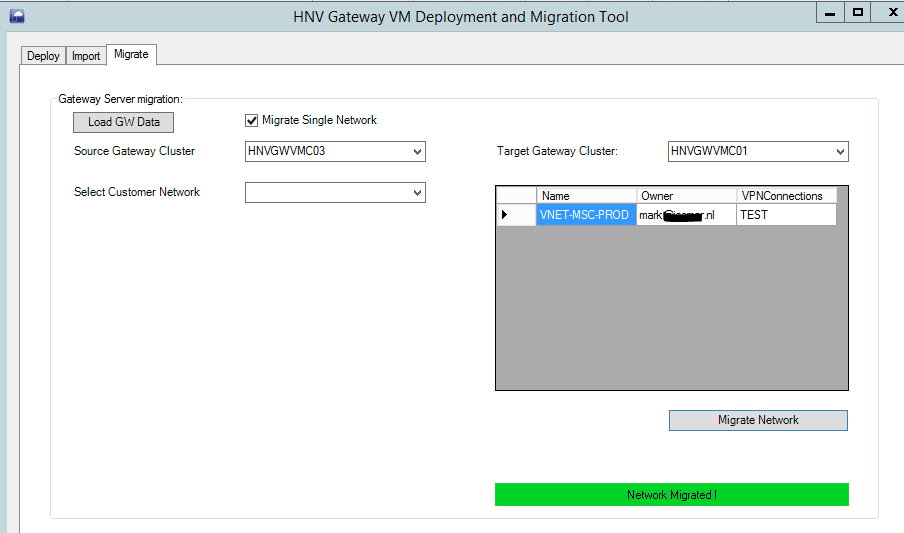
When the migration is finished the view will be refreshed and my network will be visible on the right column:
When I uncheck the Migrate single Network I will see other remaining networks on the old cluster. Now I will move them also to the new Gateway Cluster:
Now it is migrating:
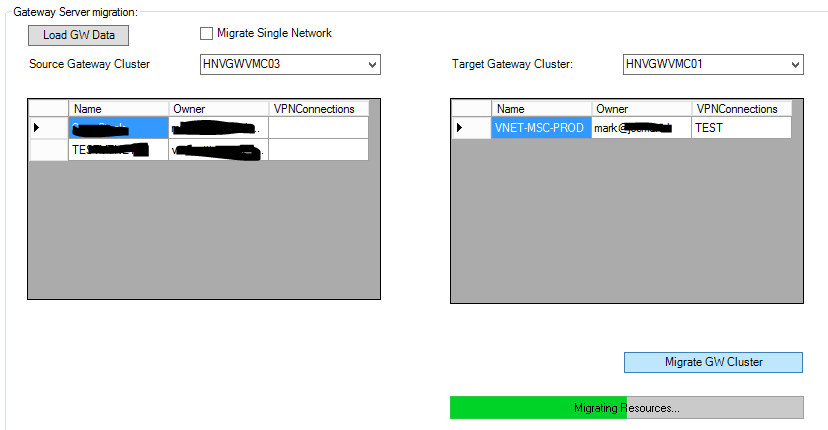
And the cluster is empty and all networks are running on the new Gateway Cluster:

I have created a short video to see the tool in action:
I hope you find this useful. If you have any comments or questions please let me know. Twitter:@markscholman